My friend Michelle just graduated with a Masters in Environmental Science. For her thesis project she studied the mosquito-spreading virus Chikungunya. I went to see a presentation of her work and on the title slide of her presentation she had an image of the earth with a giant mosquito sitting atop it. The mosquito was piercing the world with it's stinger and a little trickle of blood was oozing out. She really knows how to get your attention.
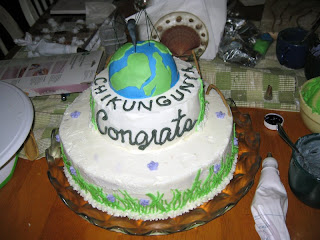
When I heard that her boyfriend was throwing her a surprise graduation party, I offered to make the cake. As I was sketching out ideas, I kept thinking of this mosquito sitting on and piercing the earth. So, I decided to make it the centerpiece of the cake and make the rest of the cake look very nature oriented with some grass and "twigs."
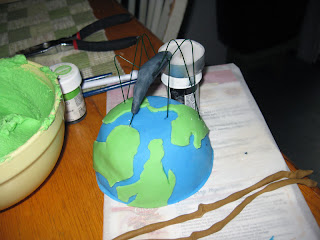
The "world" was made buy pouring cake batter into a glass bowl and covering with fondant. I began to cut out continents, but one look at it and Jon's expression said it all. I am not an artist. I can craft, I can sculpt, but I can't draw. That's his department. So, when he asked if I wanted him to do it...I said yes faster than you can say Antartica. He did an amazing job and it definitely made my world look realistic.
 I sculpted the mosquito out of gumpaste and used wire for the legs and stinger. I made wings, but they were too heavy for the body and I ended up leaving them off completely. Who cares if my mosquito is anatomically correct? If people know what it is...then it's a success in my mind.
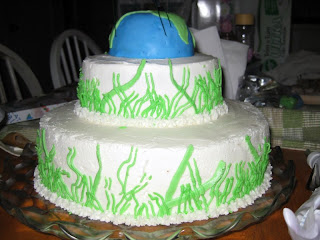
I had two tiers to the cake. Using 2 different piping tips, I created "grass" coming up the sides of the cake. I added a few flowers to make the lower parts of the cake a bit more pleasing to look at.

I wanted some wood to balance the grass (green, brown, and blue are the colors of the earth in my mind). I created "twigs" out of gumpaste and put them sticking out of the bottom tier of the cake.

Finished off the cake with the virus that Michelle was studying and VOILA! - my first disease oriented cake! (Given my profession...it probably won't be the last).


